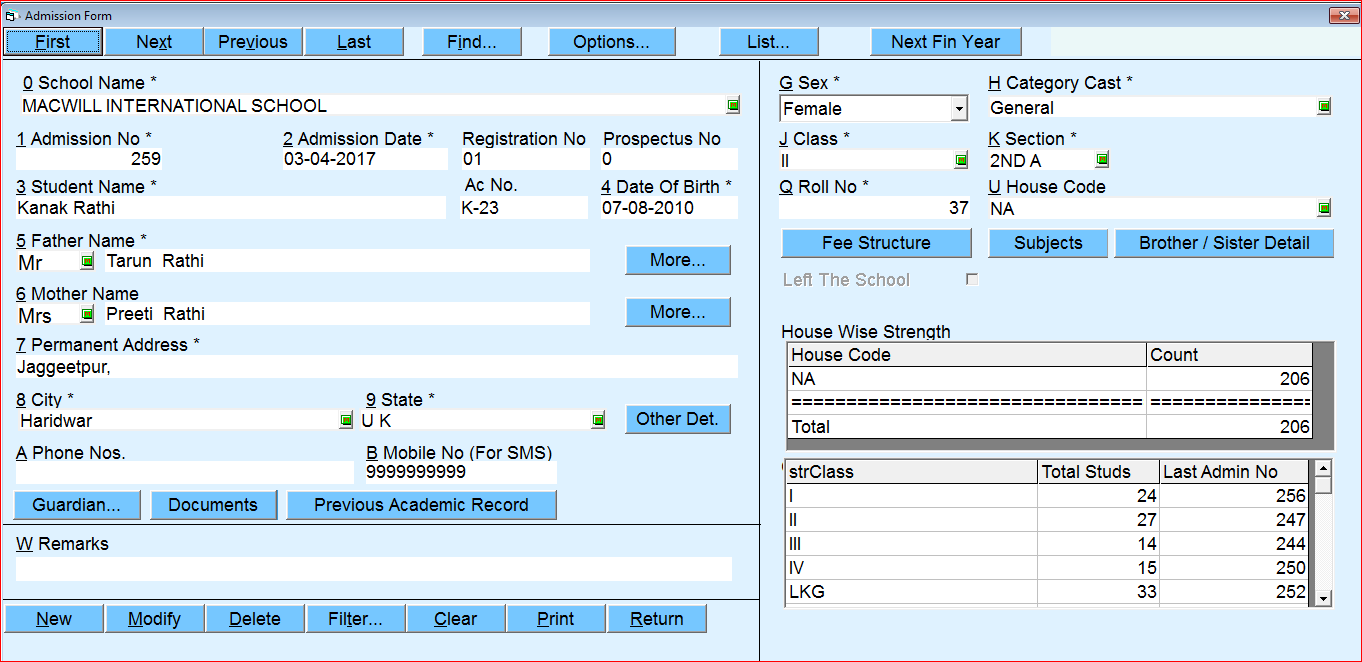
Adission form
Admission Form
This is the form where detailed information regarding a student can be stored.
To open admission form click on admission form icon at Bell desktop or you can choose from master menu, It can also open with key board short cut by pressing Ctrl+A.
Enter student information in detail. Fields marked with “*” are mandatory and can't leave blank. Like” J Class*”, underscore characters like “J” are refers to shortcuts, those are working with “Alt” combination key e.g.to direct move cursor to class by key board you have to press “Alt+J”.
As many fields are self explanatory.

Choose your school name
- Enter admission no. (Accept only Numeric character) Bell will display next admission no. according to last admission no. but user can modify it by replacing desired no. This no is used as primary key for student. For all transactions or reports regarding a student this no would be required.
- Admission Date – it should be "dd-mm-yyyy" format. you can enter without parameters like if you want to enter 1 Jan 2014 you just enter “010114” and press enter button, software will auto formatted your entered date like 01-04-2014.
- Enter father & mother name starting with Mr. Dr. and can be created more by pressing F1 button.
- City and State of student- city and state will auto display from school address
- Enter Roll No. student – if user don't know it at early stage then it can leave with default roll no. BELL has facility to rearrange roll numbers of student later on (Master>Promote Demote>Rearrange Roll no.in bulk)
- If brother sister studying in other class, enter their admission no. (If you do not know their admission no. then press F1 to search by name or other fields.)
- Next fin year - by click on this button user can admit (pre-admission) student for next financial year All details are same as admission form discussed earlier.
8. User can see new admitted
Note: To add any new text in drop down list you can press F1 button after clicking or selecting desired list. In case of networking or client system all photo browse path should be via networking to display all photos on network.
Created with the Personal Edition of HelpNDoc: Easily create EPub books